Friday, 12 October 2012

thrifted living room

The living room slash boyfriend's studio is still looking a little sparse, but we've made it livable-in. Actually it's rather cosy considering it was totally empty when we moved in 5 weeks ago.

Well, that's not entirely true - the nondescript linoleum was here. And it's staying, though ideally we'd change it to something more natural...

We furnished our whole apartment with thrifted, mostly 50's - 70's era furniture and accessories - under 250€. The living room takes up a big portion of that money spent. I think we've done very well; it can be expensive over here even second hand.


The sofa which converts into a double guest bed has its original claret coloured brocade upholstery in perfect condition and has very clean lines. It also has a trunk-like storage area underneath the seat. We spotted it in the Red Cross half-price furniture sale and wanted it right away.


We picked up two handmade velvet cushions too in a super olive green which looks great against the muted dark red.


The off-white cotton rug was given to us for free. It covers a big chunk of the lino floor and ties together and lifts all those wooden tones and the darkish colours.


That teak fruit bowl holding our 5-a-day was a lucky find - I pulled it out from under a big pile of baby clothes. It has a good period shape and I really like the way it looks like an extension of the table surface.


The two-tone coffee table has a nice modernist shape too. It has a rather large surface area which is lovely and it has a rather bashed up look with lots of round teacup stains and such. We are thinking to sand and re-varnish it next spring.


This twin standing lamp is a very common one of its time, nothing special, but I had a table version of it in orange as a child which is long gone, so it's nice to have come across this.

Then onto my boyfriend's space. Excuse the jungle of cables, we are yet to figure out how to magic them out of sight.
The desk is a great big old office sort, equipped with lots of drawers with different functions. It's stamped underneath by the maker which doesn't seem to exist any more, but I found out that they were based in Lahti near Helsinki.


He also got himself a really nice anglepoise lamp in a pillar box red. These are quite common too, I see them a lot in various conditions in local flea markets - but this one has a super vintage Jaffa sticker sporting its previous owner's name too. Which we love.


This Italian patio chair was bought from the recycling centre, it's one of a pair. There were 4 of them there, but one had a big hole in the seat. I can't believe someone got rid of the whole set because one of them broke! Well, lucky for us - we got two comfy bouncy chairs to sit on for almost no money at all.


I'm really liking this find of mine which is a white plastic watering can Made in Finland. It has a very characteristic shape - which I wouldn't call elegant but I have a lot of nostalgia attached to objects from the soviet/70's era, so to me it's lovely!
It has a bumpy surface texture and has a measure cast into the back even though it's not possible to see the water level through the opaque plastic...

<edit 13/01/2013 Well, I thought this was vintage 70's but no! I've just discovered it on the shelves of one of the biggest supermarket chains locally...it fooled me with it's shape, which still looks very 70's to me, and I still like it just as much - I guess this water can might have one thing common with ants; if the design works why change or evolve?>


The little ASKO table below is another favourite find - lovely clean lines and a nice light wood veneer, called 'funkkis' over here because it's functional. It has a nice big drawer where we keep all those random things that we use often - torch, phone chargers, keys, that sort of stuff.
ASKO is a Finnish furniture design chain and is still in business today.

The Swedish machine embroidered linen cloth is also thrifted - reminds me of Transylvanian embroideries a little.


Wednesday, 10 October 2012

new old kitchen curtains: from 'too short' to 'just right'

Remember the striped 70's curtains from the last flea-market report?


Yes, they were the ones for the kitchen window, and yes they did come up too short for it...

I guess if you really really like something, and if it's the exact look and quality you are after, and if the price is so right that it's almost wrong, a cunning plan might emerge spontaneously to budge the purchase along.

That's exactly what happened - we spotted a tablecloth in a similar weave and colourway, and a lightning-fast blueprint sketched itself out in my head about how I'm going to use the tablecloth to extend the curtain length.


Well, by the time we walked home another possible solution came to me.

I'd been collecting vintage braids and I remembered that one roll in the stash has the cutest orange chickens on it. I compared the two options - choppy tablecloth extension or quirky chicken braid - and the chickens won.


Here are the steps I took to bring about a happy fusion of the perfect yet imperfect curtains and the kooky chickens:

1.
My mission was to gain about 10cms of length yet retain as much of the original look as possible.


2.
My curtains had a lovely wide hem on top which meant extra length to be freed up, so out came the seam ripper.

TIP: The thing to look for when buying a lengthening project candidate: is there a big fat turn-up or wide hem which can be unpicked and let out to gain some extra length?


3. 
I preserved a centimetre of seam allowance so I could tidy up the top neatly. Then fired up my trusty iron and set about pressing that tough old crease out.

TIP 1: Spray the old crease with much water and set the cloth aside folded - this way the fibres soak in the droplets, enlarge and relax so the ironing will be more effective.

TIP 2: The unpicked seam might leave the fabric marked, the crease that's been there for the last 40 years might be quite persistent. Relax - these should become less visible with every wash and iron.


4.
The next step was to measure the new length of the curtains.
Accordingly, I calculated how much length was still needed. And here the chicken braid was entered. I needed an extra 5cms still to cover the windows comfortably; to this I added the width of the braid as seam allowance, then multiplied this sum by two. This was the length of braid I needed to cut for my loops.

Then I determined how many loops my curtain needed to be held up by - quite a few as I didn't want big gaping drapes at the top.

Following this, I measured the top width of my curtains and allowed for seam allowance each end, then cut two long lengths of the braid accordingly.

I pinned all the loops in place, pinned the backing braid length over them and clipped the curtains up on the window as if they were ready.
Important move in order to see if anything needs changing! I needed shorter loops because I could see a lot of top window frame... It saved me some frustrating unpicking.


5.
Adjustments done, next I machine stitched the top edge of the braid to the curtain top, loops held in place by pins.

Then I turned my curtain to the right side and stitched down the bottom edge of the braid - I wanted to make sure I don't crinkle up the right side.


6.
And voila there I had my new old curtains - now perfect in length too.

The top shows off a small amount of chicken action; the busy kooky braid is only supporting the curtains but not taking away from their glory - which is exactly what I was going for.


I haven't figured out how to take a good photo of daytime windows without the otherworldly glare, so please excuse the picture quality and the imploding fir tree...


As to what happens to the now excess 70's tablecloth?
There's a slight off-chance that it will become wall art - I'll keep you posted! <edit 04/07/2013: it has become a kitchen tea towel! see the DIY here > 

Monday, 8 October 2012

washi tape from Pennsylvania

In a previous post I told you about how Lady Luck winked at me many times lately.
One manifestation of it was my winning of fabulous give-away prizes.


The postman came last week and brought me my first ever set of washi tapes from the lovely Anne from Pennsylvania.

On her blog Anne's Mail she blogs about writing letters and receiving snail mail, stamps, mail art and other topics like vintage and DIY. To celebrate her 50 followers milestone, she generously offered a mini washi tape set to a lucky reader who turned out to be yours truly here!


I have never used or had any of these Japanese stationery before but now I have some - and such lovely ones too - I see endless possibilities of use. These will primp up anything plain or boring looking and will make gift wrapping more fun.

So thanks so much Anne for your giveaway - the prize has come to a very good home!

Do you use washi tape? Ever used it for anything arty - what did you make?

Friday, 5 October 2012

two hammers and a dress (and everything else in between)

I've found some lovely things again - a whole random mix of them!

These two old hammers sang to me from the shelf with their nice shapes and un-hammer-like colours. I really like how they look next to each other. Bargainous too for a couple of euros each.

vintage hammer old hammers hand tools

Here they are in full size. By the way, in case you are wondering 'why hammers' I wrote about my affinity for vintage hand tools on my other blog in this post.


From hammers to a late 70's /early 80's Finnish cotton dress. It's a long dress, the hemline is mid-calf which is way too long not just for my liking but even for the camera to capture.


Length being wrong, but the colour and the shirtwaister style is spot on, and the cotton is lovely! It has deep blue dyed mother of pearl buttons and is a nicely made thing. It cost me 3 whole euros.

It will receive a make-over soon which will be documented on this blog and will definitely include the scissor treatment for a new hemline.


Then I found some very sweet unused 70s seasonal greeting cards. First I thought they might be repros, but their bumpy texture and their slightly foxed reverse sides gave their true age away.


Got a few more kitchen accessories - bright ones, as there is a lot of natural wood and white units in there. A red onion basket and a colourful chevron potholder brighten the place up for sure.


My boyfriend found this enamel bowl and then I found a matching cup. They are in brilliant condition too. I'm yet to do my homework on their maker and their age, I don't know anything about enamelware yet I decided I'm collecting them...


Then another joint find: a pair of stripy cotton curtains from the 70's and a similar era, similar look tablecloth; all in orange and brown with lots of white, which happens to be one of my favourite 70's colour combos!


We both fell in love with the curtains, but alas they came up about 10 cms too short for the window in their destination, the kitchen.

After much measuring and doing maths (not over the price, they were only 1.50 each) we settled on a plan to lengthen the striped beauties to fit.

I will show you how I resolved the length issue next week - they turned out petty neat!

Monday, 1 October 2012

good karma - and a little giveaway

I've been so lucky recently.

In what?
Well, in my everyday circumstance in general, then in finding new friends in this new town, and at flea-markets of course. 
Plus I've been winning a lot of giveaways in the blog world recently, which means lovely prizes are winging their way to me to make me feel even luckier. I'm going to show off my winnings here and blog about each of them as they arrive.

First up let me tell you about this package that dropped through my mail box from Said the Pelican, all the way from America.

said the pelican bird flower note cards snail mail blog giveaway
blog giveaway competition bird note card flower postcards said the pelican good karma

Kevin from Said the Pelican very kindly sent me two packs of his beautifully designed and printed note cards as a consolation prize.
You see, I wanted to enter a giveaway to win them but I wasn't eligible as I live outside the US so I had a little sad moment and sounded it out there... I really didn't expect that I'd be given a prize for that, but sometimes the universe works in mysterious ways...!


Each of the 10 designs in the pack are different and the card stock is beautiful too! They come delightfully packaged with hand stamped red envelopes.

I've been thinking about that great feeling when I see an email in the inbox announcing that I am a winner of someone's giveaway and that something lovely is going to come my way... and I thought I'd like to give back, I'd like someone else to enjoy that feeling too and have the thrill of waiting for the postman and opening a surprise package. 

All these wonderful prizes I've been winning almost command it - so I'm offering one lucky reader half of my Said the Pelican cards! That's got to be good karma!


And now the details of....

THE GIVEAWAY!

  • I am offering one of the packs of cards to one lucky winner. Enter via the Rafflecopter below.
  • The winner can choose either the birds, the flowers or an equal mix of the two. 
  • The winner has 3 days to respond, if no response is received then another winner will be chosen.
  • The giveaway will run from 1st October - 15th October (EST time).
  • This giveaway is open to Idle Needle readers - so if you are not following yet then make sure you sign up now!
  • The giveaway is open to international readers.

Friday, 28 September 2012

fabric finds & a new crafting corner

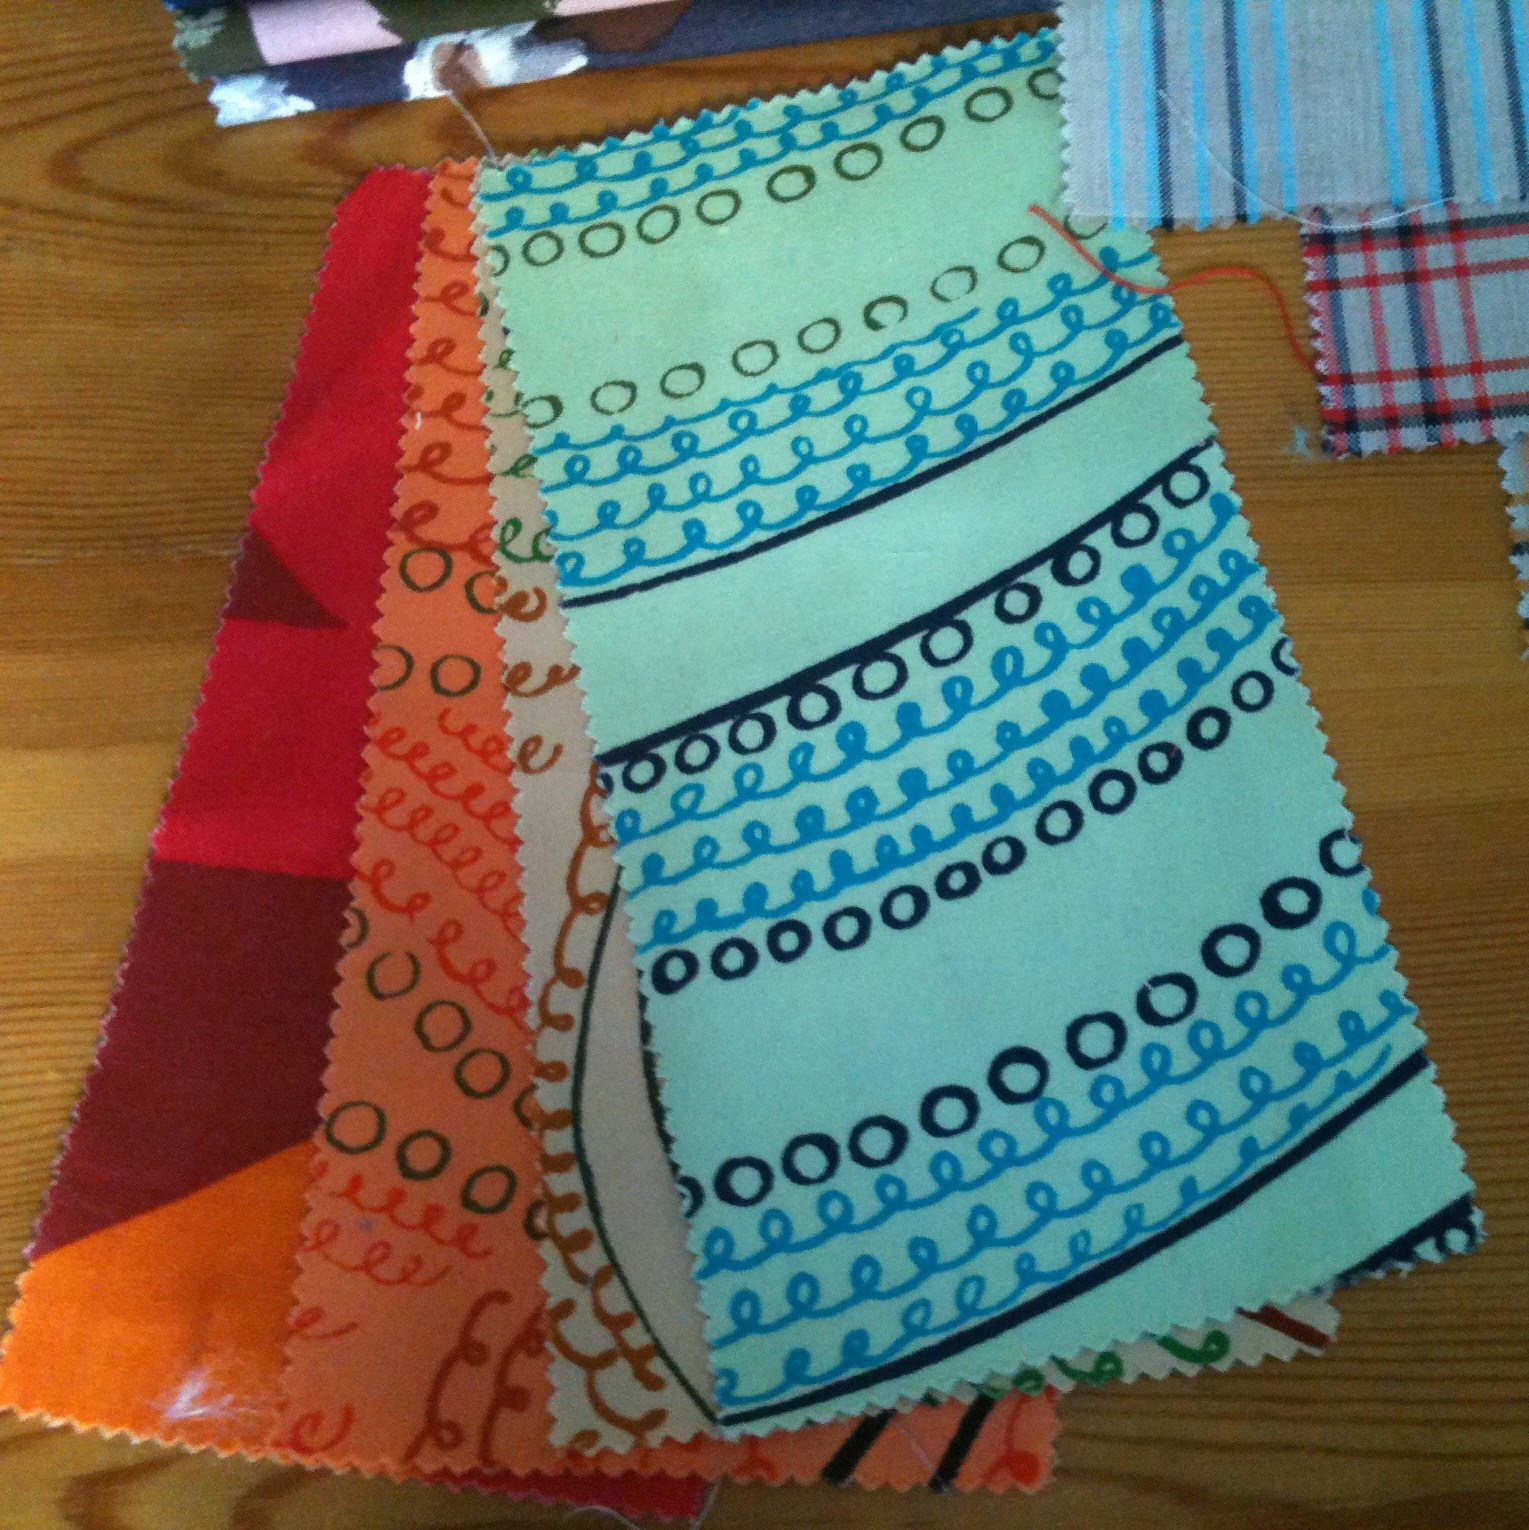
I haven't bought any fabric for a while because I have a stash of some lengths and offcuts, but when I saw this small bundle of vintage swatches I couldn't resist it. It cost just a single euro.

Look how nice and varied the selection is:
 

So what will I do with them? Well, I have some big plans... I won't tell you any more about them right now but am planning to reveal all hopefully soon. So stick with me!

Back to the finds.
I also found some pure vintage cottons in pretty printed patterns - the bottom ones are a pair of curtains, but they turned out too short for the window so I decided to stash them.

You know I have just mentioned that I have these big plans...I have been thinking about them for a while now, and finally they can start becoming reality because....*drumroll* I've thrifted cleverly and put together a new crafting spot for me!

I know that my new sewing spot is in a very pared-down and basic state at this point and needs personalizing with splashes of colour and pin boards but I've got to be patient and appreciate it as is because I haven't had a space at all to sew or draw for the last 6 months.

The sewing machine survived the international shipping so that is not a thrifty find but a happy survivor. 

The 60's - 70's Singer sewing table was €10 from the local antiques & secondhand dealer's. I jumped for joy when I saw it and there was no question about getting it.

The chair was found in the Red Cross second hand furniture store - a really sturdy lightweight thing with a lovely shape - potentially a candidate for a colour make-over...
The original price tag was for €15 but we happened to go shopping on a day when all furniture was half price so we got it for €7.50. (And many other things too - will blog soon.)


In the same Red Cross store I spotted this roll of old newsprint. It cost only €2 and it's perfect for pattern drafting and such. Or lining drawers even. Liking the ink marks on it a lot.


And - even though I blogged the iron and ironing board in my previous post - here they are again, because they are an important part of my new crafting corner and they make me happy. It's a joy to work with good equipment.


Related Posts Plugin for WordPress, Blogger...